
It’s snowing! It has been so pretty all day, and I am really feeling in the Christmas mood. I’ve been wrapping gifts, listening to Christmas music and crafting up something to share with you all!
If you are into really embellishing your Christmas gifts, and you know how to crochet, then this is the project for you! I promise it will only take you about 5 minutes. Maybe 10 minutes if you are a newbie to crochet. This is the perfect project if you are just getting used to the whole crochet thing. 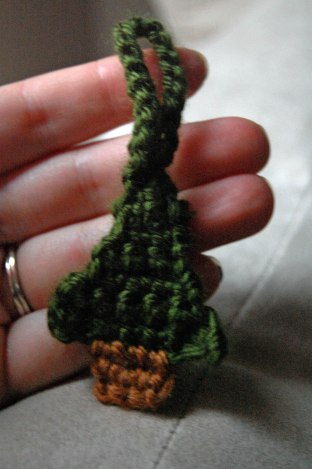
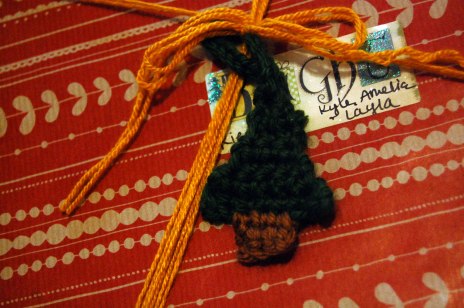

I decided I wanted to dress up my Christmas gifts that I will be giving out, so I created this pine tree and loved the simplicity of it. It is so cute and small, but you could definitely use a larger hook size to create a bigger tree. The great thing about this is you can dress it up however you’d like. Prefer it plain and rustic? Leave it the way it is. Want to add a bit of color? Figure a way to add some ornaments to your tree. This is a great project to use up yarn scraps, as I did. If you don’t have green and brown, you can always make a colored tree, or whatever you’d like!
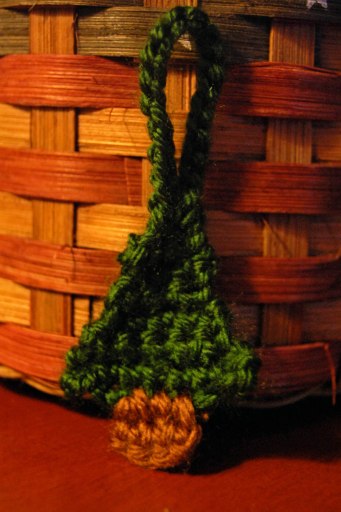
I love the rustic look of the colors in my tree. Both yarns are from Red Heart Soft. The green is called Leaf Green and the brown is called Toast. I absolutely love the look and feel of the Red Heart soft yarn!
If you just love the look of this little tree for decorating your home, try stringing a bunch on some string/yarn for a garland, or hang them with string in front of your windows! There are so many possibilities for these little guys.
Here is the pattern FREE just for you! And just in time to get going before Christmas.
Mini Crochet Christmas Tree
Supplies:
Hook Size: E/4 – 3.50mm
Red Heart Soft yarn in Green and Brown (or any worsted weight yarn will do)
tapestry needle
The number at the end of each sentence shows how many stitches you should have in each row.
Sc = single crochet | St = stitch | Ch = chain | Sl st = slip stitch
_________
TREE TOP
– Ch 9
Row 1 – sc in 2nd ch from hook, sc 6 there will be 1 space left, ch 1 and turn (7)
Row 2 – skip 1st st, sc 5, ch 1 and turn (5)
Row 3 – skip 1st st, sc 4, ch 1 and turn (4)
Row 4 – skip 1st st, sc 3, ch 1 and turn (3)
Row 5 – sc in 1st st, sc all across, ch 1 and turn (3)
Row 6 – skip 1st st, sc 2, ch 1 and turn (2)
Row 7 – skip 1st st, sc 1 (1)
– chain 18, then sl st back into the top of the tree to make the loop, and tie off.
TRUNK
Row 1 – With the right side of your tree facing you, insert hook into 3rd st (counting from the right) at the bottom of your tree, Sl st and ch 1, sc into same ch 1 space, sc 2, ch 1 and turn
Row 2 – sc in all 3 st and tie off (3)*
Weave in ends.
*If you are using a larger hook, you can repeat Row 2 until you have the length you want.
I have never written a pattern and published it before, so I really hope everything is as clear as possible! You may use the finished product however you like. If you will be selling this item, please give me the pattern credit and link back to me. The selling of this pattern is NOT permitted. Thank you!
The best part about this Christmas/Winter decoration? It is reusable! :)
Enjoy, and happy crafting!
The Happy Homemaker
